General Pet Door Questions
Wall Mounted Pet Door Questions
Door Mounted Pet Door Questions
Sliding Glass Door Pet Door Questions
Sash Window Pet Door Questions
General Pet Door Questions
How do I measure my pet for a pet door?
Please see our
Measuring Guide for a detailed guide.
Should I choose a Double or Single Flap?
Most of the pet doors we sell are double-flap doors. The air-space between the two flaps of a double flap wall mount will insulate much better than a single flap pet door and the double flaps will stand up to wind much better. Double Flaps will look more finished having a flap on both sides of the wall. We also haven't encountered any additional difficulty for the pets in using a double flap provided that a reasonable flap size is chosen by the customer. If you live in a very moderate climate, or the door will be under a covered area or in an unheated garage/shed, then the single could be an adequate option. In the end, Endura Flap pet doors seal so well that a single flap should be adequate for most moderate climates. Single Flap doors will have the flap on the inside and a trim frame to finish out the opening on the outside.
Which side does the locking cover go on?
For Patio Pacific Pet Doors, the locking cover is on the inside of the house so outsiders cannot unlock it. Also, when there is bad weather you will not be forced to go outside to close off the in wall dog door.
I have a Great Dane and an 8 pound Yorkie. What dog door should I get?
Hale offers doors that are great for large and small dogs sharing because the flap is easy to push and giant sized doors are offered. Another option would be to get a
Plexidor Electronic Dog Door so that your 8 pound Yorkie isn't trying to push open a Great Dane sized flap. You want to make sure that you measure both pets to get the size that comfortably fits both pets. You don’t want the step over too high or the flap too low so the big dog is left having to crouch.
My dog or cat won't push on a flap do you have a pet door that would work?
Any of the motorized
Plexidor Electronic Dog Doors would be good in this situation.
What if I want to close the door at night, how can I do that?
Most doggie doors (with the exception of kennel use type doors) will come with some way to close it off when not in use. The more common types are the “slide-in” closing covers, such as with the Patio Pacific Endura Flap Pet Doors. These ones will slide in from top to bottom. The electronic door option can be programmed to be opened and closed at certain times. A neat feature of the
Hale is that they offer a “side load” option in case there is something above the pet door like a window sill. This way you can actually slide the cover in from the left or the right side. The
Plexidor has a keyed lock in the medium, large, and X-Large sizes, and an aluminum cover that you can screw on if you are away for a longer period of time for extra security.
Will I have a hard time training my dog to use the Endura Flap?
With the proper training, your dog should get the hang of it. To make it easier for your dog to learn how to push the flap open, you can adjust the magnet strength. Only the Endura Flap has variable magnet strength.
You can rearrange the magnets to either make it have increased wind resistance or to make it easier for pets to open.
Please also see our Training Guide for more information.
Can I paint over my Patio Pacific pet door?
Satin and bronze (anodized) should not be painted. A special primer and additional preparation is required. However, for white painted doors, they can be painted using a good indoor/outdoor spray paint like Krylon or Rust-Oleum. The surface must be prepared first by removing the gloss on the white paint using a Scotch-Brite pad or fine steel wool. Just break the gloss, do not sand the paint off. Then clean the surface using mild detergent and water, or isopropyl alcohol. The Trim Frame can be painted, however we do not recommend painting the Flap Frame because:
- It would need to be partially disassembled (remove flap, strike, and side magnets).
- There are many difficult to access areas which could lead to drips and non-painted areas
- Paint could cause the flap to stick.
Wall Mounted Pet Door Questions
What are the advantages/disadvantages of installing a pet door in a wall?
Advantages: You may have no other convenient locations for your pet door, in which case it is handy to know that the wall is an option. A pet door in a wall can always accommodate a double flap version of the pet door you want if that is available. The double flap version will always insulate, seal, and stand up to wind better than a single flap version. If you want to remove the pet door at some future date (say you sell the house and the buyer doesn’t want the pet door) and you’ve installed the pet door in a door, then you’ll be buying a whole new door which can be expensive. On the other hand, depending upon the type of construction, a pet door in a wall may be removed and the wall patched pretty inexpensively.
Disadvantages: Installation through a wall can be dangerous! If you cut into electrical conduit or pipe you can be injured or even killed. We recommend a licensed contractor for this type of installation.
If the siding is practically anything other than stucco, it can be difficult or impossible to remove the pet door and patch the wall so that it looks “like new.” Brick siding, rock siding, wood or shingle and vinyl siding all present problems when removing a pet door from a wall.
The same consideration is true for the inside wall. Drywall is easy to patch, but wood paneling may not be. If the wall is thicker than about 8” (not very common but it happens) the selection of “self-framing” pet doors diminishes greatly. If the wall is thicker than 16” there are no “self-framing” options except for a few cat-sized pet doors. Since wall studs are usually 16” on center, a pet door requiring a “rough cut” wider than 14 ½” will probably not fit between your existing studs. There are ways to solve this problem but, again, only a licensed contractor should attempt them.
What does it mean to "frame out" a wall?
A wall installation pet door must always include a tunnel through the wall. The primary purpose of this tunnel is to ensure that water cannot penetrate into the interior of the wall-- a leak into a wall if not quickly discovered and repaired would have very serious and expensive consequences. As a secondary issue, the tunnel provides the pet with stable footing.
There are two ways to accomplish this tunnel. The first and easiest is to purchase a “self-framing” wall mount pet door. This type of pet door will be provided with its own tunnel which is typically adjusted by cutting to fit the depth of the wall in the case of the studerier wall mounts with aluminum tunnels. Or telescoping for some of the more economy style plastic models.
The second way is to frame the wall yourself (or have your contractor do it) typically using lumber to build a wood tunnel through the wall. In either case the tunnel is carefully caulked to ensure water-tightness and any wood used is sealed.
While framing yourself is probably going to involve more work and expense, it does have the advantage of allowing you to use virtually any pet door for your wall installation. That advantage is largely offset by the fact that there is a very good selection of “self-framing” wall through pet doors to choose from.
What if my wall is thicker than 8"?
If the wall is thicker than 8", the selection of self-framing pet doors goes down. We recomend a
Hale Wall Mounted Pet Door or
Plexidor Wall Mounted Pet Door.
What is the difference between a door mount and a wall mount dog door?
Doggie doors for walls must always have a tunnel through it for support and structural purpose, while a door mount does not. The hardware will also vary depending on the manufacturer and model, and also some will come as a complete unit with tunnel and hardware included like the Endura Flap for Walls.
Is it easy to install a wall mount?
There are many steps that must be taken to ensure that a wall mount is safe and secure so that internal wall damage doesn't occur and so that a safe tunnel can be built. For this reason, along with the framing that must take place, it is not easy to install a wall mount. We highly recommend you hire a licensed and insured professional. Cutting a power line or hitting a pipe with power tools could cause injury or even death.
Can I install a wall mount in a wall with siding? If so how would I do that?
Yes, you can install a wall mount into a wall with siding. There are several of ways to install the mount, and this depends upon your particular installation situation. Some customers choose to lay the wall pet door on top of the siding and other recess it into the siding for aesthetic reasons. The main thing would be to make sure that everything is properly sealed up.
Door Mounted Pet Door Questions
Does it matter if my door is hollow core rather than solid core?
It used to matter a lot. In the old days pet doors consisted of a frame and flap assembly for one side of the door and sometimes, but not always, a decorative trim frame for the other side.
These worked fine in a solid core wood door (though you did need to seal the exposed wood if you didn't want rot). If you wanted to install one of these in a hollow core door, you had to "frame out" the door first so that the weather didn't get inside the door between the two pet door frames. Of course, the lumber yard didn't have any wood that would fit inside the sides of the hole that you cut so you needed a table saw to fit the frame pieces. It was a huge hassle.
Then Pet Eze Company developed a pet door where the outside frame wrapped through the hole in the door to meet with the inside frame. All you had to do was caulk the seam between the two and you were done. No framing or sealing needed!
Today nearly every pet door on the market is self-framing though not all and you should remember to check especially if your door is hollow-core.
The main reason a self framing door is nice is because it makes the appearance of the overall door much nicer, as it covers up the mistakes you might have made along the way. The self framing door gives it a full, professional look at the end of the job. It also makes it easy to seal everything in, keeping the moisture out of the inside of the frame and preventing damage to the pet door or the door itself.
The same consideration is true for the inside wall. Drywall is easy to patch, but wood paneling may not be. If the wall is thicker than about 8” (not very common but it happens) the selection of “self-framing” pet doors diminishes greatly. If the wall is thicker than 16” there are no “self-framing” options except for a few cat-sized pet doors. Since wall studs are usually 16” on center, a pet door requiring a “rough cut” wider than 14 ½” will probably not fit between your existing studs. There are ways to solve this problem but, again, only a licensed contractor should attempt them.
What exactly does it mean to be "self-framing"?
Self-framing' means that the frame of the pet door wraps from the inside around to the outside of the door. The result is that the 'core' of the hole that you cut is hidden or 'framed off'. This is a desirable feature because it is neat and finished-looking. If the core of the door that you are cutting into is hollow or insulation-filled, it must be framed out which is difficult to do yourself without a table saw and some carpentry skills. Instead, let the pet door do it for you! The illustration at far right shows a cross sectional view of a self-framing pet door.
The illustration at near right shows that a self-framing pet door can be adjusted in a range of thicknesses. The illustration shows a self-framing pet door installed in a thin panel. All self-framing pet doors can be installed in standard dimension interior or exterior doors. But be sure to check the adjustment range if you plan to install in a thinner material--such as a metal kick panel in a screen door--or a thicker material--such as a wall--to be sure that the pet door you choose will adjust to the particular installation.
For installation in particularly thin materials such as a thin metal kick plate, a security grill or the siding between studs in an unfinished wall consider the Petsafe Classic pet door as it will adjust to as thin as 1/16th inch.
By contrast, a 'Standard' pet door will provide a frame for both sides of the door or wall, but the frames won't meet in the middle so the core, or interior, of the door or wall will remain exposed.
Please note that even though you use a self-framing pet door, you should still use caulking to ensure that no moisture gets through a seam to damage the interior of your door or wall.
Any self-framing pet door will have an adjustment range. The adjustment range for some doors may be limited so it is important to be sure that the thickness of the door you plan to install in is in that range before buying.
Can I install a pet door into a garage door?
Yes, a dog door can be installed in a garage door, but it is probably hollow and may be thinner than an ordinary door so we recommend going with one that is self-framing as described above. Although, there are a few issues that arise such as how the flap may hang when the garage door is open as well as the overall safety of your pet in an area where cars may be coming and going. As a result, we don't particularly recommend this option, but the Endura Flap pet door can work for garage doors as they have significantly more magnet strength to keep the flap in place when the door is raised.
Is installation of a dog door in a ‘people’ door easy?
That highly depends on the type of door, surface material and your handy skills. Please refer to the installation instructions for your specific product in order to help understand the difficulty of the installation. These can usually be found on the product page under the “Installation Instructions” tab.
Does it matter how thick or thin the door is?
Every self-framing pet door has an adjustment range that indicates the thinnest and the thickest doors it can be installed in. If you go too thin, the pet door is loose and prevents it from fully fitting into the hole in the door, creating more room for moisture and potential damage to the door. If you go too thick, the inside and outside frames do not meet leaving your inside rough cut out exposed. So it is important to measure the thickness of the material that the pet door will go into before hand and make sure that figure is inside the range of the pet door you are considering. Each self-framing pet door on this site shows this adjustment range in the features on each specific product page. For very thin doors, such as storm doors, we highly recommend the Patio Pacific Endura Flap as it can frame down to ½” in the single flap version.
Note that you can always shim out the opening if the door is too thin. Clever work with a router can fix the case where the door is too thick.
Does it matter what material my people door is made out of?
In most situations, as long as your door material is sturdy enough to support the installation of the pet door then it does not matter what material the door is made out of. You will also want to make sure that your door is the appropriate thickness for the pet door you are planning to install. However, one situation where it does matter is if your door is made out of metal and your pet door you are trying to install is an electronic door. In this case, you may have a problem with the functionality of your pet door. This type of situation would require a wooden frame between the door and pet door, and the special instructions for installation would help guide you through this process.
Sliding Glass Door Pet Door Questions
What is the difference between the Patio Pacific Thermo Panel and the Patio Pacific Quick Panel?
The Thermo and Quick Panels are identical except the Quick Panels have heavy duty single pane glass while the Thermo Panels have dual pane, low 'E' glass. For this reason, the Quick Panel is a better fit for more moderate climates or where a lighter weight panel is desired and the Thermo panel is more suitable for four season use and extreme weather.
How do I tell if my sliding glass door is dual-pane or single pane?
Open your slider and put a finger on both sides of the glass. If your fingers look like they're touching, you have single pane glass. If they stop about 1/2" apart, you have dual pane glass. You probably won't be able to tell if you have a low "E" coating, though you may see a slight tint that would give it away. To the right is an example of what a dual pane/low “E” coating door would look like, so you can better determine what type of door you own.
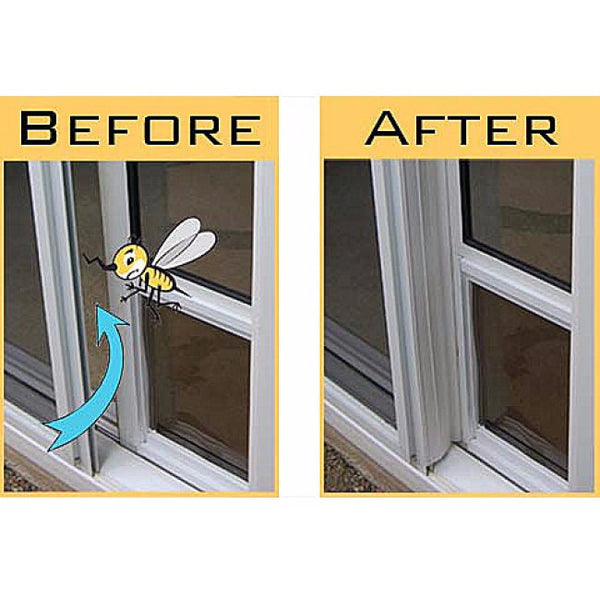
Will insects be able to come through the doorway, between the sliding glass door doggie door and sliding screen door?
You can still get ventilation with a glass track installation by opening the sliding glass door and bringing the screen up even with the pet door. But how do you stop a bug from flying in between the screen and the pet panel?
The best solution to this problem is the
Bug Warden which was specifically designed by a Southern California engineer. Simply select the option to add the Bug Warden when you are adding a Sliding Glass Door Pet Door to your cart.
The Dreaded "Bug Gap"
How will I lock up my house with the installed sliding door doggie door in place?
Patio Pacific pet doors include either a pin lock, c-clamp lock or dead-bolt lock to lock the glass door against the pet door, depending on the model or size ordered. These can be used for both temporary and semi-permanent types of installations and are extremely effective. Note that pin locks are most readily used when the sliding panel is on the inside track. If it is on the outside track (an uncommon situation), it may be easier to install a threshold mount dead-bolt type lock.
In addition, you may also use a
'Charley Bar'. The Charley Bar mounts behind the sliding glass door on the jamb and locks the sliding glass door against the pet door. You don't need a pet door to use a Charley Bar. They're frequently used just to improve the security of a sliding glass door. When used with a pet door, the Charley Bar has an important added benefit. The pressure applied is near the center of the sliding glass door which results in more even pressure between the sliding door and the pet door. This, in turn, helps make a tighter seal between the two and reduces the chance of a leak.
My sliding glass door has 2 sliding doors. Do you have any patio panel pet door inserts that will work for this type of door?
Depending on the track setup we have had customers install the Thermo Panel IIIe in this type of sliding door. However, a good way to install them is to move one of your sliding glass doors over offsetting it. Then install that sliding glass door pet door and make the offset slider stationary, serving as the wall.
Sash Window Pet Pet Door Questions
What exactly is a Sash Window and how is a pet door installed in one?
A sash window, or ‘double-hung’ window consists of two window units, one above the other, in separate tracks. The bottom unit slides up and down in the inside track and in the case of double-hung windows the top unit may slide in the outside track as well. There may be a locking device in the center where the two window frames meet.

This installation is very simple, and may require no tools. The lower window is raised and the pet door is positioned in the track beneath the window. Then the window is closed down on top of the pet door sash.
What are some specific points that I should think about when considering a sash window pet door?
Is the window close enough to the floor that my pet can easily and safely access the pet door? If not, do I have a way to put steps or a ramp to make it accessible? The same consideration applies to the outside of the window as well, say if your window leads out to a deck where they would have to step up or down to get through. Is insulation quality a major concern when choosing your sash window pet door? Or is keeping other animals out a bigger issue? The window track width is also important, as it has to be wide enough to accommodate the framing of the sash window. The
Patio Pacific sash windows will require a track that is at least 1” wide. Knowing how high you can raise the window in order to install the door is another piece of information you will need.
What will I have to do with the screen on my window that I want to install a pet door in?
The screen must come off in order to allow your pet to enter and exit freely. Your screen should be held in a frame that can pop off the outside and you can store for future use.
Can I switch the side the pet door is on with the Patio Pacific Thermo Sash? How?
Yes you can switch the side the pet door is on. You can start by removing the screws on the top and bottom, then sliding the flap assembly out. Once it is removed you simply flip it upside down and slide it right back in. Next you put the screws back in, tighten them all down and you’re finished.
Can you make a Patio Pacific Thermo Sash smaller than the 22" adjustment?
Not generally if you want glass in it. What you can do is trim down the spring loaded piece on the side, to give you an extra ¾” of compression so that you can get it down to 21-¼”. If this is still not enough then give us a call with your dimensions because we might be able to build one for you that only uses metal and not glass. This may not seem as nice aesthetically, but it will get the job done and you’ll be very happy with the Endura flap choice.
How high do I have to raise my window in order to get the Extra Large flap size for a Thermo Sash IIIe?
To get the extra large flap size, you will want to raise the window height by 30 1/2". Sash Pet Doors are not adjustable in height, so taking this measurement before placing the order is very important. The last thing you want to do is order a flap dimension that is too large and will not fit, meaning that you have to pay for all the return shipping fees. If it is a custom size, then it would be non-returnable.
I ordered the 22" - 25" range for my Thermo Panel, but my window is actually 25.5". Is there anything I can do to make it work?
You can use the included extension (3/4") with the anti-whoops feature, and this can help to extend your window if it's a little short. You could also slide a piece of wood into this groove to achieve the same effect.

 Login
Login

